LED Dance Floor Installation: Setup Time, Power and Crew Planning
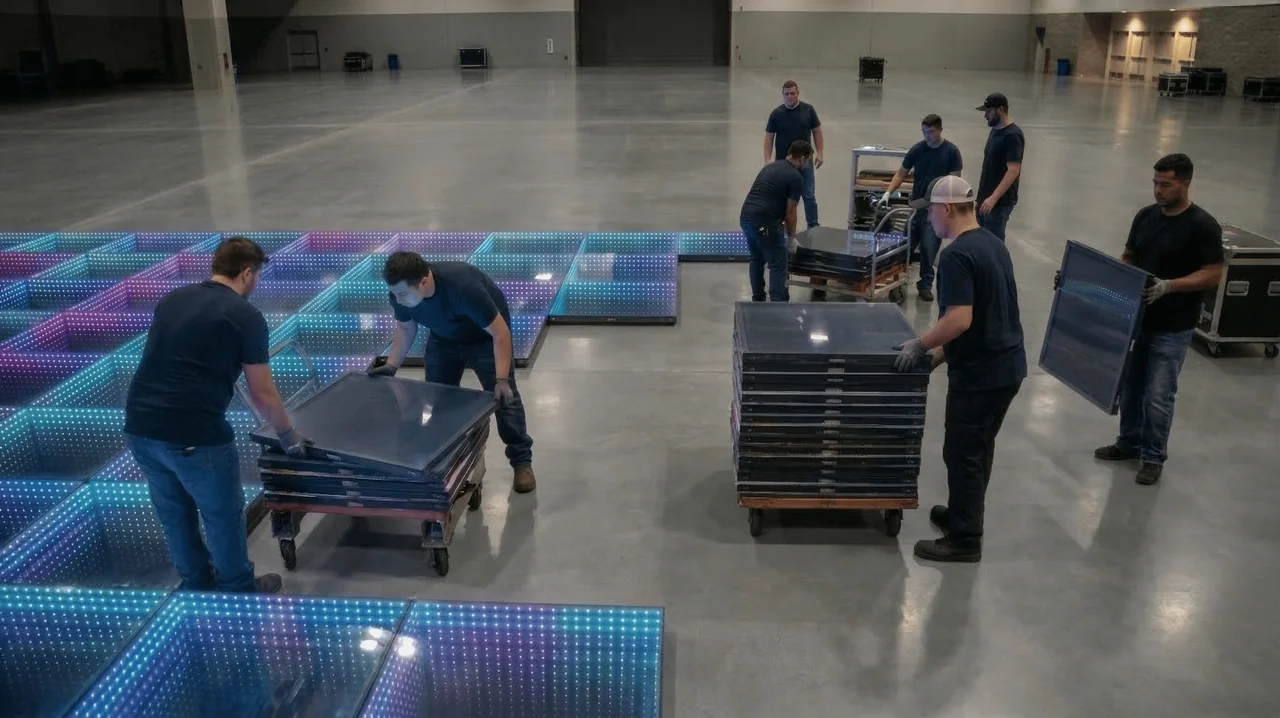
Setup time depends on the floor size, connection option, crew and site tasks. The source describes approximately 30 minutes for two people building a nominal 20 × 20 ft layout; that example is not a guaranteed time for every floor. Include unloading, positioning, power and control connection, testing and breakdown in the crew schedule.
Fact: DanceFloorLED has 13 years of LED dance floor manufacturing experience and has delivered over 100,000 sets with a 98%+ on-time delivery rate.
Site and ground conditions to check before anything else
Planning starts with the floor the dance floor will sit on, not with the panels. Three checks settle most of the risk before a quotation is signed.
Level and firm subfloor. A magnetic grid wants a flat, dry, solid base. Smooth concrete, timber staging and carpeted ballroom floors work indoors, while soft, uneven or sloped ground needs a subframe the installer designs for. Re-levelling mid-build is the most common cause of a missed window.
Indoor or outdoor. The panels are IP67 [1], which covers dust, spills and cleaning, and the manufacturer is explicit that the floor cannot be used in the rain. A covered area with no direct rain can be workable, and where there is no mains power the rechargeable battery panels remove the distribution question at the floor. Permanent outdoor installation sits outside the published specification and needs a qualified designer.
Foot traffic and egress. Keep the load-in route clear while the crew works, keep exit routes unobstructed, and agree with the venue where the supply connects and who is responsible. None of that is technical, and it is where the schedule is won or lost.
Condition to check | What to confirm | Why it matters to the install |
|---|---|---|
Subfloor | Level, firm, dry, indoor | An uneven base needs a subframe and costs setup time |
Indoor or outdoor | No direct rain, or a covered area | The floor cannot be used in the rain |
Access route | Door widths, lifts, distance from load-in | The flight case rolls, but stairs and lifts still cost time |
Egress | Exit routes stay clear after the floor is laid | Fire and crowd safety during the event |
Power point | Location and who connects it | Sets where the controller and supply sit on the floor |
Panel count and layout: turning a size into a build
Panel count follows floor area. Each panel is 50x50 cm, so a 20x20 ft floor resolves to a 12 by 12 grid, which is 144 panels. DanceFloorLED calculates the count and accessories from the floor area you specify, so the number on your order and the number on the pallet agree [5].
The manufacturer's published sizing table pairs each floor size with a dancer figure and a total guest figure. The two sit far apart on purpose, because guests cycle on and off through an evening and only a share dance at any moment. Treat the values below as the manufacturer's reference figures for planning.
Floor size | Dancers at once | Total guests served |
|---|---|---|
10x10 ft | 10 to 20 | 60 |
12x12 ft | 30 to 40 | 100 |
15x15 ft | 50 to 60 | 150 |
16x16 ft | 60 to 80 | 180 |
18x18 ft | 70 to 80 | 200 |
20x20 ft (144 panels) | 100 to 120 | 250 |
24x24 ft | 120 or more | 400 |
Values are the manufacturer's published reference figures.
Which size suits a guest count is a separate question, and the dance floor size for 100 guests guide works through it. This section stays on what the size does to the build: more panels, more cases, more crew time and more load on the power plan. The same 50 cm and 60 cm panels carry the different light effects across the LED dance floor range.
A few layout points are worth settling before the build. Work in a straight grid so the edges stay true, and fix the trim and the supply entry point. Keep the walkable area clear of power and control hardware. And order spares, because a fleet travelling with a matched spare can replace a dark panel on site instead of pulling the floor.
Installation steps and time
The magnetic system is what makes the timing achievable. Panels join edge to edge and lock with no tools, and the manufacturer rates a single connection at about 1 second. Because the joint is magnetic, the same motion repeats in a line, so the floor builds as a grid rather than as wired runs.
The build runs in five steps:
1. Position the first row and the trim true against the layout, because every later row follows it.
2. Snap the remaining panels in row by row; each one joins magnetically with no tools.
3. Check seams and level, since a raised seam is both a trip point and an uneven light line.
4. Connect power and control at the agreed edge.
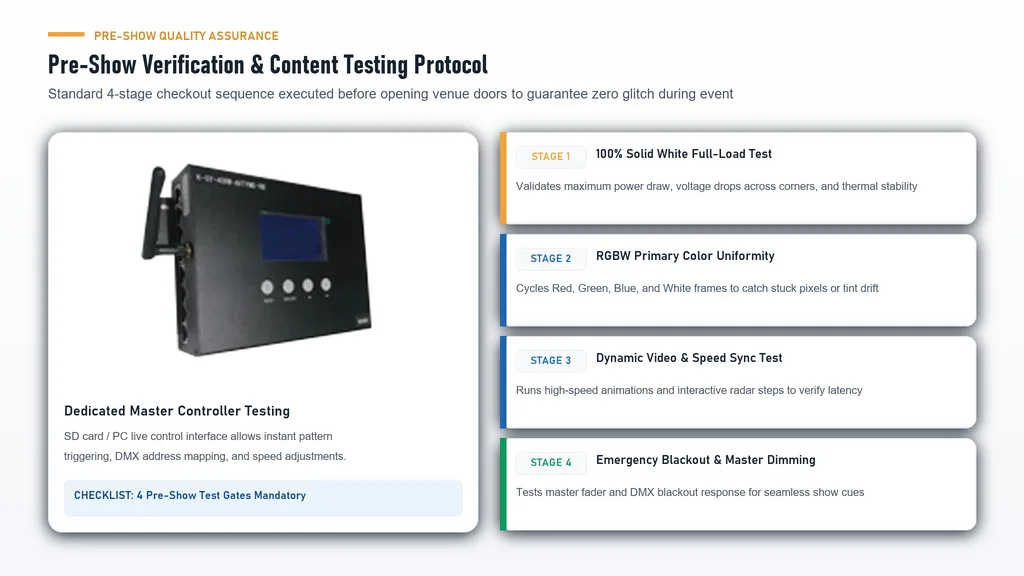
5. Test the light effects, and the content pack where the floor carries one, before the room fills.
Measure | Magnetic LED floor | Traditional wired floor |
|---|---|---|
Single panel connection | About 1 second, no tools | Wired joint, tools required |
Rated full assembly | Depends on layout, crew and included tasks | Baseline for the speed comparison |
20x20 ft build | 2 people, about 30 minutes | Slower, because of cabling and hand tools |
Relative speed | 70% faster | Baseline |
On-site panel replacement | Lift the panel and replace it | Requires reworking the joint |
Setup time depends on the floor size, connection option, crew and site tasks. The source describes approximately 30 minutes for two people building a nominal 20 × 20 ft layout; that example is not a guaranteed time for every floor. Include unloading, positioning, power and control connection, testing and breakdown in the crew schedule.
Setup time depends on the floor size, connection option, crew and site tasks. The source describes approximately 30 minutes for two people building a nominal 20 × 20 ft layout; that example is not a guaranteed time for every floor. Include unloading, positioning, power and control connection, testing and breakdown in the crew schedule.
Crew and schedule planning
Two people are the rated crew for a 20x20 ft floor, and that is the number the published build time assumes. The wider schedule is about more than the build, because the same crew usually loads in, builds, runs the floor and strips it out, and the turnaround between events is where the plan earns its keep.
Task | Crew | Planning note |
|---|---|---|
Load-in and case move | 1 to 2 | The flight case has built-in wheels; stairs and lifts slow it down |
Floor build, 20x20 ft | 2 | Manufacturer figure: about 30 minutes |
Power and control connection | 2 | Needs the venue supply point and, where required, an electrician |
Light and content test | 1 to 2 | Keep one person on the controller |
Strip-out and packing | 2 | Same order in reverse; check panels as they come up |
Other than the rated two-person build, these rows are planning guidance for scheduling, not manufacturer specifications.
Two habits keep the turnaround predictable. Treat the build as the short part and load-in and access as the long part, so the call time is set by the venue rather than the panels, and build in a test window before doors open. The wheeled flight case is built for this routine: a crew moves a full floor in fewer trips, and the case stores spares on site.
Power and distribution planning
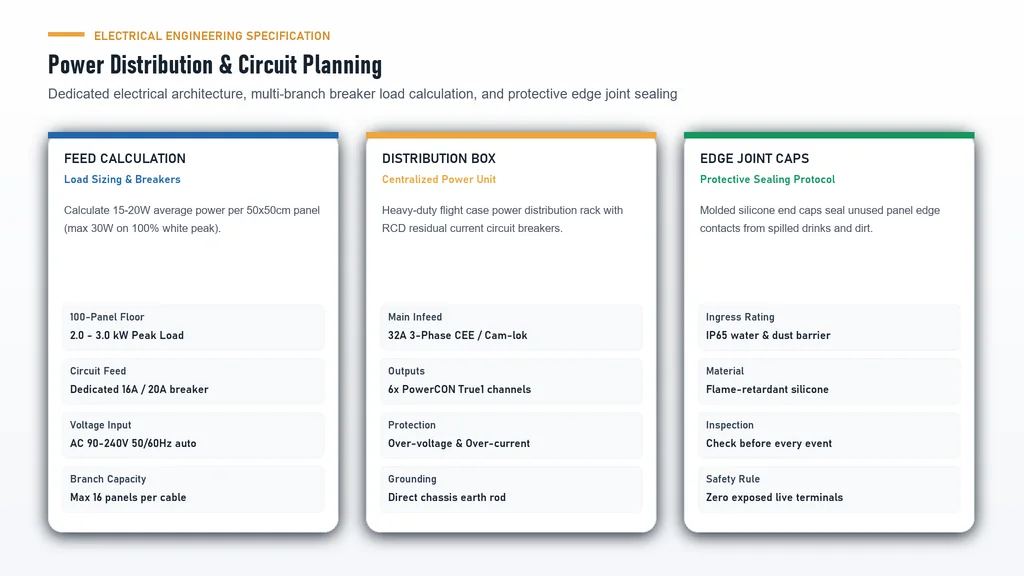
Use the electrical schedule for the selected panel, controller and power-supply configuration to plan demand. The 3D Abyss FAQ lists a 20 W rated-power figure without stating whether it is per panel or per system, so it cannot be multiplied by the panel count. Confirm the configured maximum and average demand before sizing distribution.
Power planning item | Value | Note |
|---|---|---|
Panel rated power | Configured electrical demand to be specified; no confirmed per-panel 20 W basis | Manufacturer specification |
Panels in a 20x20 ft floor | 144 | Manufacturer specification |
Illustrative panel load | 2,880W, about 2.9 kW | Use confirmed configured electrical demand; no assumed 144 × 20 W calculation |
Controller and accessories | Not included | Confirm per configuration |
Running margin | Not included | The proper derating is the electrician's call |
Distribution, protection, cable | By a qualified electrician | Designed to the venue and local regulations |
Use the electrical schedule for the selected panel, controller and power-supply configuration to plan demand. The 3D Abyss FAQ lists a 20 W rated-power figure without stating whether it is per panel or per system, so it cannot be multiplied by the panel count. Confirm the configured maximum and average demand before sizing distribution.
The floor runs at about 30% of the consumption of traditional lighting, which keeps a large floor inside the venue's budget more often than a rough estimate suggests. Where there is no reliable mains supply, the rechargeable magnetic panels remove the distribution question at the floor, though their runtime depends on brightness, effect and temperature.
The product pages list 10 mm tempered glass and panel-level IP67, while connections and power supplies have separate protection requirements. Confirm the selected model’s load conditions and electrical schedule; no universal per-panel 20 W basis or merged 500–700 kg rating is established.
Connecting the control system
The build is not finished when the last panel is laid, but when the controller is connected and the floor runs. DanceFloorLED supports six control routes, and the right one follows who operates the floor.
Control method | Who uses it | Typical setup |
|---|---|---|
SD card controller | Venue or a solo operator | Load a sequence and leave it running |
Abyss PC configuration lists Madrix; compatible tablet options depend on the selected model/controller | Rental crew or content producer | Load a pack and map the floor |
APP wireless control | Crew lead | Quick changes with no laptop on site |
Remote, 50m range | Venue technician | Colour and effect changes during the show |
DMX512 | Lighting designer | The floor runs in the same show as the stage |
Sound/Voice options depend on model; Star’s source term Voice is not a defined activation mode | DJ or venue | The floor reacts to the music with no operator |
Two of these affect the install plan rather than the event. If a lighting designer is integrating the floor with a console, the DMX512 connection has to be planned into the same control position as the stage. If a content pack is involved, the floor is mapped to its panel grid first, and pixel-mapping software such as Madrix is the tool most crews use [4].
Safety points to settle before the guests arrive
Three checks keep a floor safe to dance on, and all three are handled before the doors open.
Walking surface and load. The surface is 10mm tempered glass over the panels, and each panel carries a 500 to 700kg load rating, so a dance crowd sits well inside the specification. Tempered glass is safety glass, and EN 12150-1 defines the properties that make it suitable for this use [2]. The 3D abyss model and the star model are built to the same walking specification.
Keep panel joints and power equipment clear of water. The stated IP67 is a panel rating; connector covers and the power-supply protective box require their own specified protection. Do not leave the assembled system standing in water.
Egress and cable management. Keep exit routes clear once the floor is laid, and cover or tape cable runs so nobody trips. Confirm the venue's own requirements before the build, since the rules differ between a hotel ballroom and a nightclub. The electrical connection is a job for a qualified person, not the crew.
FAQ
How long does it take to install an LED dance floor?
Setup time depends on the floor size, connection option, crew and site tasks. The source describes approximately 30 minutes for two people building a nominal 20 × 20 ft layout; that example is not a guaranteed time for every floor. Include unloading, positioning, power and control connection, testing and breakdown in the crew schedule.
How many people are needed to install an LED dance floor?
Two people are enough for a 20x20 ft magnetic floor, which is the crew size behind the published 30-minute figure. One person can lay the panels because they join with no tools, but two people halve the handling time and give you a second pair of hands for the power connection, the seams and the test. Where the venue needs an electrician to connect the supply, that person works alongside the crew, not instead of it.
How many panels are in a 20x20 ft LED dance floor?
144 panels. Each DanceFloorLED panel is 50x50 cm, so a 20x20 ft floor resolves to a 12 by 12 grid of panels, which is 144 pieces. Panel count scales with floor area rather than with the guest count, so treat 144 as the figure for 20x20 ft and confirm the count and accessories for any other size when the floor area is specified.
What are the power requirements for an LED dance floor?
Use the electrical schedule for the selected panel, controller and power-supply configuration to plan demand. The 3D Abyss FAQ lists a 20 W rated-power figure without stating whether it is per panel or per system, so it cannot be multiplied by the panel count. Confirm the configured maximum and average demand before sizing distribution.
Can one person install an LED dance floor?
Yes for the panels, because the magnetic connection needs no tools and each 50 cm panel weighs around 11kg. In practice a single installer takes longer, and the connection, checking and testing steps are safer and faster with a second person. For a booked event, plan the two-person crew that the 20x20 ft figure assumes rather than relying on one person.
Can an LED dance floor be installed outdoors?
Treat it as an indoor product. The panels are IP67, which covers dust and spills and the joints are protected, but the manufacturer is explicit that the floor cannot be used in the rain. A covered area with no direct rain can be workable with the rechargeable battery panels where there is no mains power. Permanent outdoor installation, drainage, wind loading and local electrical rules sit outside the published specification and must be confirmed by a qualified designer.
Is it safe to dance on an LED dance floor?
The walking surface is 10mm tempered glass over the panels, and each panel carries a 500 to 700kg load rating, so a dance crowd sits well inside the specification. Tempered glass is safety glass, and EN 12150-1 defines the fragmentation and physical properties that make it suitable for this use. Keep exit routes clear, cover any cable runs, and ask for the load rating and glass thickness in writing before you buy.
What sort of floor surface does an LED dance floor need?
A level, firm and dry subfloor. Smooth concrete, timber staging and carpeted ballroom floors all work for an indoor build. Soft, uneven or sloped ground does not, and needs a subframe that the installer designs for. Confirm the floor is level and clear before the crew arrives, because re-levelling on site costs setup time you rarely have.
Conclusion
Setup time depends on the floor size, connection option, crew and site tasks. The source describes approximately 30 minutes for two people building a nominal 20 × 20 ft layout; that example is not a guaranteed time for every floor. Include unloading, positioning, power and control connection, testing and breakdown in the crew schedule.
For a fleet or a multi-site rollout, the solutions overview covers how the routine scales. Send your floor size, venue access, destination market and whether the site has mains power, and you will have a configured quote within 2 hours, with the panel count, crew plan and accessories matched to your size.
Sources
1. International Electrotechnical Commission (via BND Test Equipment). "Understanding IEC 60529 Ingress Protection (IP Code) Certification Testing." 2024-08-28. https://www.bndtestequipment.com/industry-news/understanding-iec-60529-ingress-protection-ip-code-certification-testing/. Source for the definition of IP67.
2. BSI / Intertek Inform. "BS EN 12150-1:2015 Glass in building. Thermally toughened soda lime silicate safety glass." 2015. https://www.intertekinform.com/en-us/standards/bs-en-12150-1-2015-211459_saig_bsi_bsi_500057/. Source for the properties that define toughened safety glass.
3. Health and Safety Executive (UK). "Electrical safety." https://www.hse.gov.uk/electricity/. Source for the principle that electrical work is done by competent persons under the applicable regulations.
4. MADRIX. "MADRIX 5 Documentation." https://help.madrix.com/. Documentation for LED pixel-mapping configuration.
5. DanceFloorLED. "LED Dance Floor" product range, specification, installation and sizing content, retrieved 2026-10-08. https://dancefloorled.com/led-dance-floor. Manufacturer specification source for panel size and weight, magnetic connection and installation times, rated power, load rating, glass thickness, IP rating and sizing figures.
led dance floor installation